News
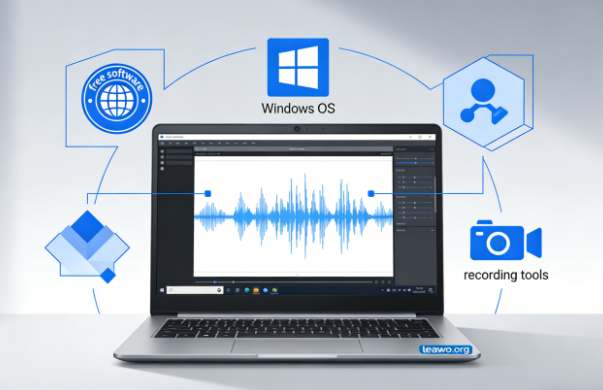
How to Record Screen with Audio on Windows for Free?
Screen recording with audio is a valuable skill. Many people need it for work, school, or personal projects. You might want to create video tutorials. You could record gaming sessions. Maybe you need to save online meetings. Whatever your reason, Windows offers excellent free options.
Good news: you don’t need expensive software. Windows includes built-in recording tools. Free third-party programs are also available. This guide shows you exactly how to screen record with audio on Windows without spending money.
Introduction
Screen recording technology has become accessible to everyone. Students use it to review lectures. Content creators make YouTube videos. Business professionals document software processes. Gamers share their gameplay highlights.
The challenge is finding the right tool. You want something simple yet powerful. It must record clear video and crisp audio. Most importantly, it should be free.
This comprehensive guide covers everything you need. You’ll learn essential pre-recording checks. We’ll explore two reliable free methods. You’ll discover solutions to common audio issues. After reading this, you’ll confidently record your screen with perfect audio quality.
Outline
- Things to Check Before Recording Screen with Audio
- Record Screen with Audio on Windows Using Xbox Game Bar
- Record Screen with Audio on Windows Using Leawo Free Screen Recorder
- Common Screen Recording Audio Problems and Fixes
- Conclusion
1. Things to Check Before Recording Screen with Audio
Preparation prevents problems. A few quick checks save frustration later. Smart setup ensures your recording succeeds the first time.
1.1. System Audio vs Microphone Audio
Two audio types exist in screen recording. Understanding them is crucial for success.
System audio comes from your computer. It includes video sounds, music, and application audio. Game sounds and notification beeps are system audio. Any sound your speakers play counts as system audio.
Microphone audio captures external sounds. Your voice is microphone audio. Room sounds and conversations are too. External microphone input falls into this category.
Different projects need different audio. Tutorial videos need your voice commentary. Recording movies requires system audio. Gaming videos often need both types simultaneously.
Think about your project needs. Choose your audio sources accordingly. Most recording software lets you select one or both options.
1.2. Audio Permissions and Settings on Windows
Windows protects your privacy with permission controls. Apps need permission to access your microphone. Check these settings before recording.
Open Windows Settings quickly. Press Windows key plus I. Navigate to Privacy & Security. Find the Microphone section.
Turn on microphone access for your device. Scroll down to app permissions. Enable microphone access for your recording software. Without permission, audio recording fails.
Check your sound settings too. Right-click the speaker icon near your clock. Select Sound Settings from the menu. Verify the correct microphone is active. Wrong device selection causes silent recordings.
Test your audio before important recordings. Speak into your microphone. Watch the input level bars move. Adjust volume if needed. System volume affects recording quality. Microphone levels should be clear but not maxed out.
2. Record Screen with Audio on Windows Using Xbox Game Bar
Xbox Game Bar comes pre-installed on Windows 10 and 11. It’s completely free and surprisingly capable. No downloads or installations necessary.
Enable Xbox Game Bar in Settings first. Press Windows key plus I together. Click on Gaming in the menu. Select Xbox Game Bar. Toggle the switch to On position.
Launch the program or window you want to record. Press Windows key plus G simultaneously. The Game Bar overlay appears on your screen. Several control widgets display instantly.
Find the Capture widget among the options. It shows recording buttons and controls. The microphone icon toggles voice recording. Click the settings gear for additional audio options. Select system audio, microphone, or both sources.
Click the circular record button when ready. A small timer confirms recording has started. The timer stays visible during recording. Perform your on-screen activities normally.
Stop recording by pressing Windows key plus G again. Click the square stop button. Alternatively, use the Windows key plus Alt plus R shortcut. This keyboard combination works anywhere.
Your video saves automatically in MP4 format. Find it in your Videos folder. Look inside the Captures subfolder. Audio is already included in the file.
Xbox Game Bar has limitations though. It cannot record the desktop. File Explorer recording doesn’t work either. You need different software for these tasks.
3. Record Screen with Audio on Windows Using Leawo Free Screen Recorder
Leawo Free Screen Recorder provides advanced features for free. It surpasses Xbox Game Bar’s capabilities. Desktop recording works perfectly. You can capture anything visible on screen.
Download the software from Leawo’s website. Install it following the simple prompts. Installation completes within minutes. Launch the program after installation finishes.
The interface appears clean and intuitive. Multiple recording modes display on the main screen. Click Screen Recorder to begin. A customizable recording frame appears immediately.
Adjust the frame by dragging corners. Resize it to match your needs. Select preset dimensions for standard sizes. Choose fullscreen to record everything visible.
Configure audio sources using the icons below. System audio icon controls computer sounds. Microphone icon manages voice input. Click icons to enable or disable each source. Both can be active simultaneously.
Access advanced settings through the gear icon. Adjust audio quality levels here. Select specific audio devices from dropdowns. Choose your preferred microphone. Pick the correct audio output device.
Click the REC button when configured properly. A brief countdown precedes recording start. Complete your screen activities as planned. Everything captures smoothly with audio.
Stop recording using the control bar button. The floating control bar remains accessible. Your video saves automatically upon stopping. The software displays the file location immediately.
Additional features enhance functionality further. Take screenshots during recording sessions. You can even save Netflix clips with audio easily. The free version includes all essential tools. No watermarks appear on your recordings.
4. Common Screen Recording Audio Problems and Fixes
Audio problems frustrate many users. These issues have simple solutions. Learn to troubleshoot effectively.
4.1. No Sound in Screen Recording
Silent recordings waste time and effort. Multiple factors cause this problem. Fortunately, fixes are straightforward.
Verify audio is enabled in your recorder. Check both system and microphone settings. Many users simply forget this step. Enable the appropriate audio source before recording.
Examine Windows sound settings carefully. Right-click the speaker icon. Open Sound Settings. Ensure audio devices work correctly. Test playback and recording before starting.
Some applications block audio capture intentionally. Streaming platforms use copyright protection. Netflix and similar services prevent recording. Try recording different applications to test. Standard programs usually record fine.
Update your audio drivers regularly. Outdated drivers cause various audio problems. Open Device Manager from Settings. Locate your audio device. Right-click and select Update Driver. Restart your computer afterwards.
4.2. Audio Out of Sync with Video
Audio delay ruins otherwise perfect recordings. Lips move but words come later. This synchronization issue has several causes.
System overload creates sync problems. Close unnecessary programs before recording. Background apps consume valuable resources. Your computer needs processing power for recording. Free up RAM and CPU usage.
Frame rate settings affect synchronization. Check your recording software configuration. Match frame rate to your needs. Use 30 frames per second for standard recording. Gaming videos benefit from 60 fps.
Hardware acceleration sometimes causes delays. Disable it in software settings. Software encoding proves more reliable. Performance might decrease slightly but sync improves.
Edit videos afterwards if sync issues persist. Free video editing software fixes minor delays. Adjust audio timing manually. This quick solution works for small problems.
4.3. Microphone Too Quiet or Distorted
Poor audio quality diminishes video value. Quiet or distorted voice is unprofessional. Fix these microphone issues easily.
Adjust microphone volume in Windows Settings. Click your microphone device. Move the input volume slider. Test different levels. Find the sweet spot between quiet and distorted.
Reduce environmental noise significantly. Record in quiet spaces. Close windows to block outside sounds. Turn off noisy appliances temporarily. Air conditioners and fans create background noise.
Position your microphone at optimal distance. Stay six to twelve inches away. Don’t speak directly into the microphone. Angle it slightly away from your mouth. This prevents harsh plosive sounds.
Improve microphone quality settings in Windows. Access microphone Properties. Check the audio format settings. Select higher quality options. Better formats produce clearer sound.
Consider upgrading to external microphones. Built-in laptop microphones are low quality. USB microphones cost little but sound professional. Even budget models dramatically improve audio. Investment pays off in better recordings.
5. Conclusion
Recording screen with audio on Windows is simple and free. You have two excellent options available. Xbox Game Bar works perfectly for applications and games. Leawo Free Screen Recorder offers more flexibility and power.
Always check settings before important recordings. Select correct audio sources. Test everything with practice recordings. Short tests prevent disaster during crucial captures.
Audio problems are usually fixable. Most issues have simple solutions. Check settings first. Update drivers when needed. Optimize your system for best performance.
Start creating screen recordings today. Use these free tools for any project. Whether for education, business, or entertainment, you’re fully equipped. You now know exactly how to screen record with audio on Windows successfully.

How to Succeed in Medical School Interviews with AYCI Academy

5 Ways to Learn About Modern Cybersecurity Practices in 2026

4 Lifestyle Changes That Come With Community Living

How to Lower Your Car Insurance Premiums Without Sacrificing Coverage

Plants You Should Be Growing Inside

Nootropic Stack Guide for Focus, Memory, and Safer Choices

The Rising Importance of International Travel Insurance in a Globalized World

A Guide to Choosing the Right Bible for Your Spiritual Journey

Personal Injury Lawyer in Houston, Texas: Wrongful Death Truck Accident Claims

Why Transfer Admissions Are a Fresh Start, Not a Setback

Essential Financial Strategies for Expanding a Business into Asian Markets

Why High Earners Are Investing Heavily in Premium Aesthetic Health

Tradeshow Booth Ideas That Help Your Brand Stand Out

How High Earners Protect Their Greatest Asset Through Preventative Health and Mobility

Why High Earners Are Treating Preventative Skincare as Their Next Big Investment

Parklife, Manchester Uncovered: How Are Big Music Festivals Planned?


Don Toliver Net Worth: Height, Age, Real Name, Career & More
Don Toliver is an American rapper and singer best known for his RIAA platinum certified songs, No Idea and After...


Finesse2tymes Net Worth: Height, Age, Real Name & Career
Finesse2tymes is an American rapper and recording artist. He is mainly recognized for his thunderous voice and motivational lyrics in...


Sugarhill Ddot Net Worth: Height, Age, Real Name & Career
Sugarhill Ddot is an American hip-hop recording artist best known for his songs, Real Facts and I Wanna Love You....


GloRilla Net Worth: Height, Age, Bio, Real Name & Career
GloRilla is an American rapper and hip-hop recording artist from Memphis. She is best known for her popular singles, “Westside...


Destroy Lonely Net Worth: Height, Age, Real Name & Career
Destroy Lonely is an American rapper best known for his 2022 mixtape, No Stylist. He is currently signed to rapper...
-
Rappers1 year ago
GloRilla Net Worth: Height, Age, Bio, Real Name & Career
-
 Businessman1 year ago
Brandon Fugal Net Worth: How Rich is Skinwalker Ranch Owner?
-

 Rappers3 years ago
BigXthaPlug Net Worth: Height, Age, Real Name & Career
-

 TV Stars1 year ago
Kaleb Cooper Net Worth: How Rich is the TV Star Actually?
-

 Internet Stars3 years ago
Mufti Menk Net Worth: How Rich is the Islamic Speaker Actually?
-

 Businessman2 years ago
7 Proven Lead Generation Strategies To Implement in 2023
-

 TV Stars1 year ago
Carla Diab Net Worth: How Rich is the TV Star Actually in 2025?
-

 News2 years ago
Trash To Treasure: Maximizing Space And Efficiency Through Junk Removal
You must be logged in to post a comment Login